
Best Sentry Stratagems in Helldivers 2? We’ve got a Helldivers 2 Defensive Stratagem Tier List for you. There are loads of Defensive Sentry Stratagems to choose from in ArrowHead Game Studios’ Helldivers and things can get pretty complicated especially if you’re playing those Defensive Missions on Helldive difficulty. These automated turrets deploy from your Destroyer Spaceship in Helldivers and they can even level the playing field if placed right. But from all the Defensive Stratagems and Sentries in Helldivers 2, which is the best Sentry in the game? Here’s our Helldivers 2 Defensive Sentry Stratagem Tier List featuring the best Sentry Stratagems in Helldivers, ranked from best to worst.
Best Sentry Stratagems in Helldivers 2 – Defensive Stratagem Tier List Helldivers 2 – Summarized
Here are the Best Sentry Stratagems in Helldivers 2 in our Defensive Stratagem Tier List:
- A/AC-8 Autocannon: Autocannon Sentry Stratagem (S-Tier)
- A/MLS-4X Rocket Sentry: Rocket Sentry Stratagem (S-Tier)
- Mortar Sentry: A/M-12 Mortar Sentry Stratagem (A-Tier)
- A/G-16 Gatling Sentry: Gatling Sentry Stratagem (A-Tier)
- A/M-23 EMS Mortar Sentry: EMS Mortar Sentry Stratagem (A-Tier)
- A/MG-43 Machine Gun Sentry: Machine Gun Sentry Stratagem (B-Tier)
- A/ARC-3 Tesla Tower: Tesla Tower Sentry Stratagem (C-Tier)
RELATED: Helldivers 2 Stratagem Tier List: Best Offensive Stratagems
Best Sentry Stratagems in Helldivers 2 – Sentry Stratagem Tier List From Best to Worst
To be fair, all of the Sentry Stratagems are some of the best Defense Stratagems in Helldivers 2 that you can bet your life on. They’re capable of dealing tons of splash damage, denying enemy advancement, and are capable of holding off choke points. But they can also incur friendly fire if you’re not careful. And strategic positioning of Sentries is a must. So git gud and learn to strategize with our Sentry Stratagem Tier List in Helldivers 2
A/AC-8 Autocannon: Autocannon Sentry Stratagem (S-Tier) – Best Sentry Stratagem in Helldivers 2
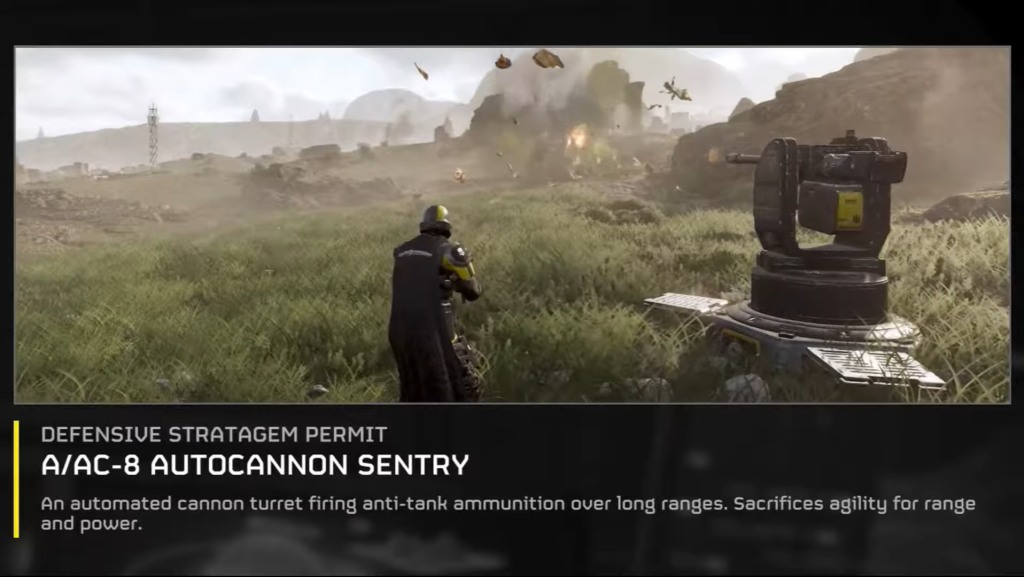
The Autocannon, what’s more to be said about it? It’s one of the best Defensive Sentry Stratagems in Helldivers 2. It functions and outputs damage similar to its equipable counterpart, but the icing on the cake is the fact that it does the reloading for you, allowing it to rejoin you in the heat of the battle.
The Autocannon Sentry Stratagem is OP. It allows you to chew through even the toughest of armored enemies. Whether you’re going up against tanks, Bile Titans, or Chargers. A few hits from the OP Autocannon Sentry Stratagem in Helldivers 2 is all you need.
And when it comes down to small-fry Automatons and Terminids, it makes quick work of them, allowing you to focus on objectives instead. But the biggest caveat here is that the Autocannon is just too OP. And with its inability to differentiate between teammates and enemies, your teammates will be sleeping with the Automatons and Terminids for sure. So, again, keep comms clear, strategically place the Autocannon Sentry Stratagem, and take out some Bile Titans.
With its inability to differentiate and volatility at selecting targets, it might just focus on small-fry, leaving out the larger Chargers and Bile Titans. Therefore, make sure to clear out weaker enemies, so that the Autocannon focuses on Primary Objectives instead.
Another problem with the Autocannon Sentry Stratagem is its inability to maneuver. The autocannon sentry has a slow turning speed, so you might need to compensate with manual fire when it fails to track enemies behind its back.
Pros
- Can take out Heavily Armored Foes Like Bile Titans and Chargers
- Splash Damage can easily kill weaker enemies
- Auto Reloading is a welcome feature
Cons
- The inability to differentiate between enemies and teammates may cause multiple redeployments.
- Volatility at selecting larger and smaller targets.
- Has a very slow turning speed, so you might have to cover its back.
RELATED: Helldivers 2: Black Screen on Launch Working Fix
A/MLS-4X Rocket Sentry: Rocket Sentry Stratagem (S-Tier) – 2nd Best Sentry Stratagem in Helldivers 2
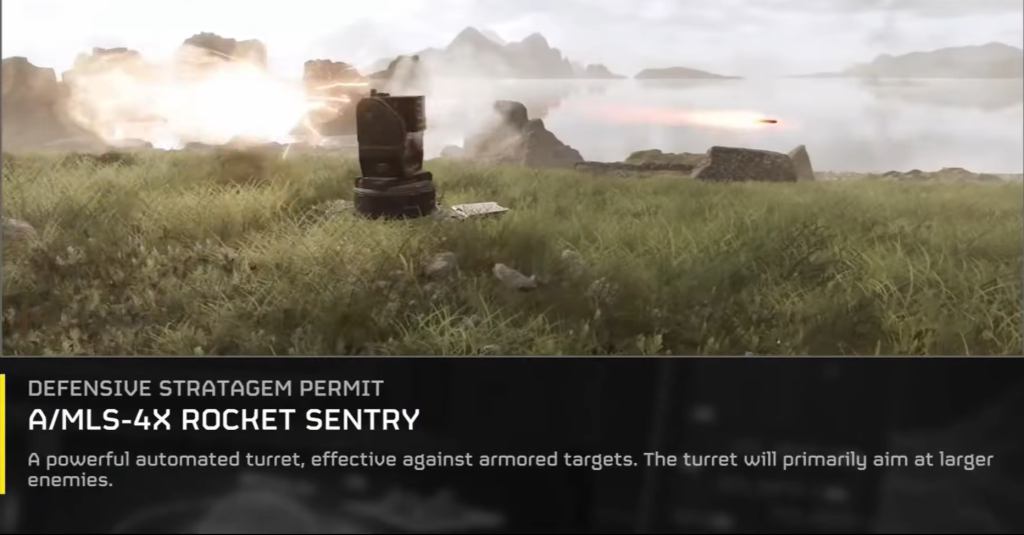
The A/MLS-4X Rocket Sentry Stratagem pretty much regions supreme when it comes down to wiping out armored targets. The best part is that it autotracks larger enemies or foes, leaving the small fry to you, or the more volatile and non-selective Defensive Sentry Stratagems in Helldivers 2.
The Best Sentry Stratagem in Helldivers 2, it takes out larger foes with 2 rocket rounds in a row and also eliminates weaker enemies with its incredibly beefed-up splash damage. This allows you to stack up tons of kills and maintains an even playing field, keeping the swarms of Terminids and Automatons at bay
While it’s one of the best Defensive Stratagems in the game, it has an unusual, yet funny quirk. The Rocket Sentry performs a weird backblast or recoil blast that’s capable of killing players or teammates or just knocking them across the floor.
So don’t stay too close to the Rocket Sentry when it’s firing a volley of rockets. Just because of this one slight hiccup, the Rocket Sentry is kicked down from S-Tier to A-Tier as this blast effect can cause some serious issues that can change the tides of a mission from winning to losing.
Pros
- Takes out armored targets with ease
- Precise auto-tracking of bigger threats and objectives
- Respectable splash damage
Cons
- An unusual back-blast effect can either knock down or kill teammates who are close by.
- Friendly-Fire can become a major concern
RELATED: How To Level Up Fast and Farm XP in Helldivers 2
Mortar Sentry: A/M-12 Mortar Sentry Stratagem (A-Tier)
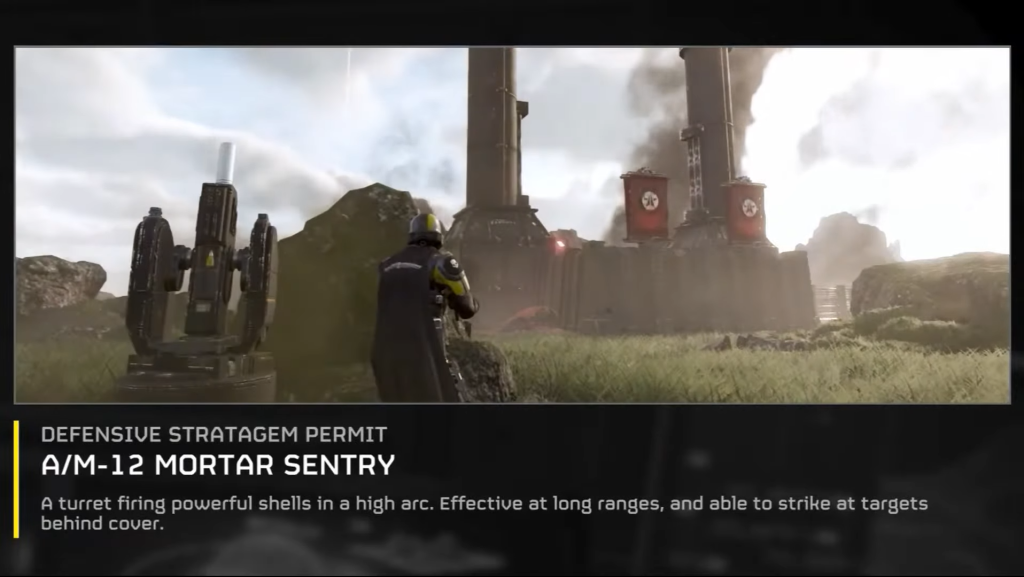
The Mortar Sentry is one of the best Defensive Stratagems in Helldivers 2. It’s capable of wiping out bug breaches, Weavers, Automatons, and light to medium-armored enemies with relative ease. The best part about the Mortar Sentry is that it can be deployed behind shields or barricades, and it will still lock onto enemies and fire 3 Mortar Rounds in a row.
While it’s pretty effective in most missions in Helldivers 2, the pinpoint accuracy or consistency of Mortar Sentries, or any Projectile-based Stratagem for that matter, has been a bit of a hit or miss. With a wide area of impact and immense splash damage, you can basically eliminate hordes of Terminids and Automatons with relative ease.
But there’s another problem with the Mortar Sentry Stratagem. Rather a problem with the playstyle. The Mortar Sentry needs to be placed strategically upon higher ground and Team coordination will play a big factor for successful mission completions and exfils in Helldivers 2.
Otherwise, misplacing the Mortar Sentry in Defense Missions might allow it to become vulnerable to Automatons and Terminids. Also, teammates should be wary of keeping their distance from enemies as the volley of mortars goes off.
The Mortar Sentry doesn’t spare the enemy or your teammates. If your squadmates are in its line of sight as it fires off Mortars, they’ll surely end up dying. You might just end up depleting your redeployment reserves and end up with your whole squad wiped out.
But when used properly, the Mortar Sentry is one of the best Defensive Sentry Stratagems in our Helldivers 2 Tier List, particularly if you’re gunning for those Level 9 and 10 Helldive Defense Missions.
Pros
- Wide Area of Impact resulting in Incredible Splash Damage
- Launches 3 Mortar Projectiles at a time
- Works Behind Shielded Barricades, even when enemies aren’t in its line of sight.
- Is ideal for taking out light to medium-armor enemies with relative ease.
Cons
- Requires proper strategic planning, and works best on high ground.
- Can wipe out teammates or the player, as it does not discern between foe or friend when closing up on the enemy.
- Consistency and Pinpoint accuracy are somewhat a hit or miss at times, but the extra splash damage is a huge welcome.
RELATED: Helldivers 2 Best Settings
A/G-16 Gatling Sentry: Gatling Sentry Stratagem (A-Tier)
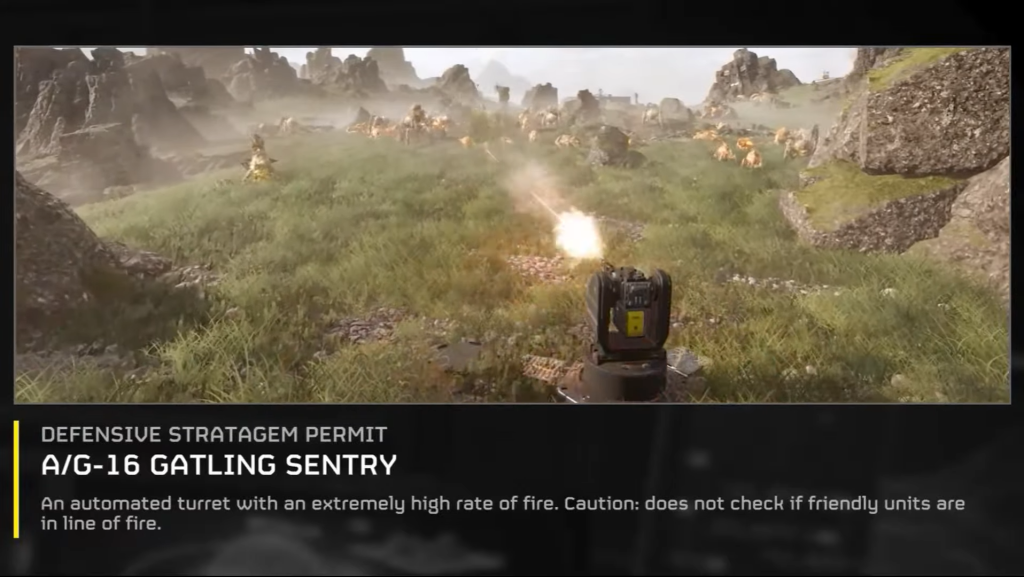
The bigger brother of the machine Sentry, the Gatling Sentry Stratagem kicks things up a notch with its increased rate of fire, allowing it to chew through unarmored enemies without taking a hitch. But with this increased rate of fire, you’re going to run into a slight problem
And it’s ammunition. With the increased rate of fire, the Gatling Sentry drains ammunition fairly quickly, so you might run into problems if you’re dealing with long-drawn fire-fights ending up with a non-functioning Gatling Sentry.
Again, its precision and tracking is pretty volatile when it comes to picking off enemies. This is a big threat to players and teammates as any teammate caught accidentally in its line of sight is pretty much toast.
Again, vulnerability becomes a big factor as well, so you’ll need to place the Gatling Sentry at a high position and within the enemy line of sight. It also works great at choke points at staving off enemy Terminids. Keep comms clear and warn your Teammates of the Gatling Sentry before deployment and you might make the most of this Defensive Stratagem in Helldivers 2.
Pros
- Higher Rate of Fire than the Machine Gun Sentry
- Clears out unarmored foes from a distance with relative ease
Cons
- Requires strategic placement to make the most of its potential
- Chews through ammunition very fast, making it nonfunctional in long-drawn battles
- Volatile tracking means teammates might get picked off
RELATED: Helldivers 2 Stratagem Tier List: Best Offensive Stratagems
A/M-23 EMS Mortar Sentry: EMS Mortar Sentry Stratagem (A-Tier)
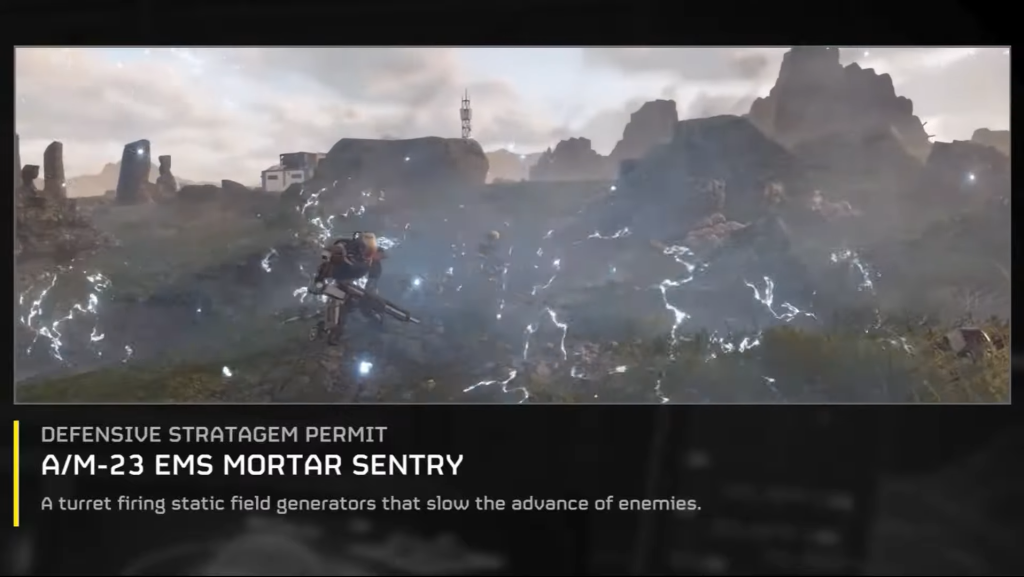
While the Orbital EMS is not that great, the A/M23 EMS Mortar Sentry proves to be a reliable Defensive Stratagem to its redundant Offensive Stratagem counterpart. The EMS Mortar Sentry Stratagem is capable of slowing down enemy foes in their tracks using a Mortar that emits an EMS wave.
This incapacitates enemies for a while, allowing you to crowd control and take out enemies that are a bit too fast to catch with hip fire or your ADS. It can hold out large hordes and even larger enemies and therefore determines the flow of battle in heated Helldive Defense Missions.
As you climb levels, the A/M-23 EMS becomes a quintessential part of your Stratagem arsenal. It works flawlessly with other Defensive and even Offensive Stratagems like Napalm Strikes, Eagle Airstrikes, and Incendiary Grenades.
Like all Defensive Sentry Stratagems, its unpredictability and volatility at selecting enemy hordes can put you on your knees literally. If you’re caught in the EMS, you’ll be vulnerable to enemy onslaughts. Your best bet would be to continuously dolphin dive till you escape its Area of Impact.
Pros
- Emits EMS Wave that stuns larger and smaller enemies in their tracks
- Effective at crowd control and denial of further enemy advancement
- Works well with Eagle Stratagems and Napalm Airstrikes
Cons
- Volatility when it comes to mob and enemy selection means teammates or players can get caught in the EMS wave, making them vulnerable to incoming enemies.
RELATED: How To Manage And Equip Stratagems Helldivers 2
A/MG-43 Machine Gun Sentry: Machine Gun Sentry Stratagem (B-Tier)
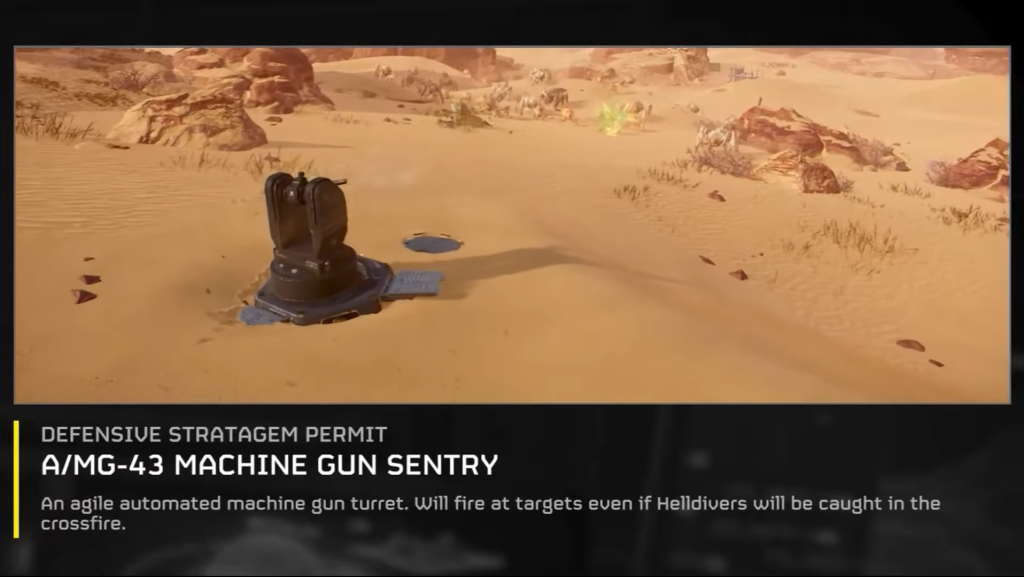
While the A/M-43 Machine Gun Sentry isn’t one of the best sentry stratagems in Helldivers 2, it offers a solid foundation for users to get acquainted with sentry setups. In early game stages, the Machine Gun Sentry is pretty useful for wiping out smaller mobs of Terminids and Automatons. But the Machine Gun Sentry Stratagem, on its own isn’t the best Sentry Stratagem in Helldivers 2, when used alone. Therefore, you’ll have to experiment and mix things up a bit!
As you learn the basics of the game, the Machine Gun Sentry can serve as a solid aid or support Stratagem for the more powerful Autocannon Sentry, Gatling, and Mortar Sentry. This allows players to thin out or chip enemies to death.
All-in-all, the Mortar Sentry is great when first acquired in Helldivers 2, allowing you to wipe out unarmored enemies and becomes a great Support Stratagem in the more comprehensive Sentry Setups you acquire as you make your way to the later levels of the game.
Pros
- Ideal for players to get acquainted with Sentry deployment
- Is great at wiping out hordes of unarmored enemies
- Complements intricate Sentry Setups, allowing players to chip and thin out enemy hordes
Cons
- On its own, its use is somewhat limited, as it’s only effective against weaker enemies.
- Not quite effective against medium to heavy armored enemies.
- Teammates caught in its line of fire will take damage.
RELATED: Helldivers 2: Beginner’s Guide + Tips and Tricks
A/ARC-3 Tesla Tower: Tesla Tower Sentry Stratagem (C-Tier)
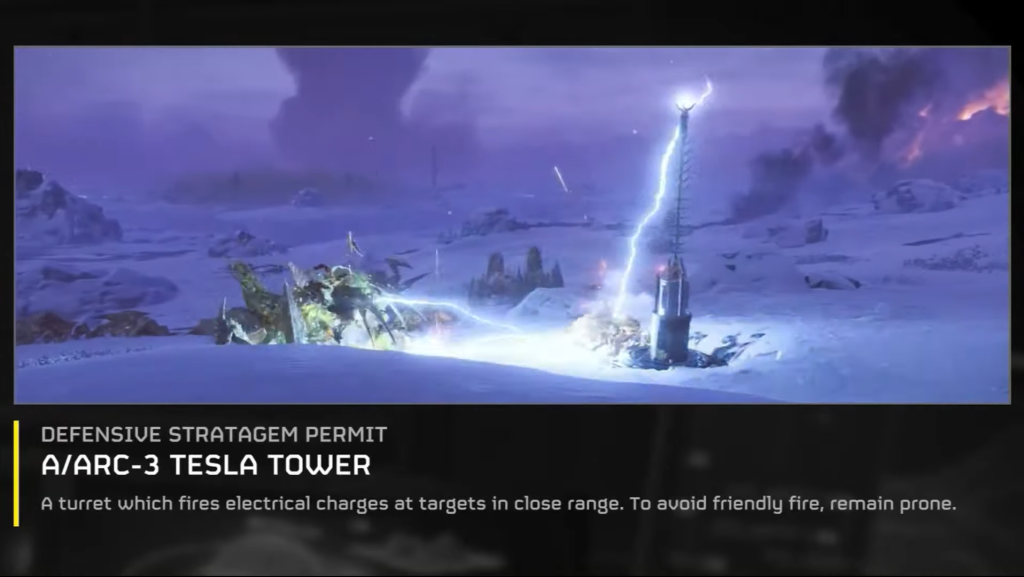
The Tesla Tower or Tesla Sentry Stratagem basically emits electrical charges and kills enemies close to its vicinity. It’s advised to remain in a prone position to avoid getting caught in its line of sight. The electric charges can jump between enemies to teammates if they’re close by causing accidental friendly fire. So caution is advised. Maintain your distance, coordinate with your teammates, and ensure proper positioning.
The Tesla Sentry Stratagem comes incredibly in handy in bug breaches and holding off choke points, especially in Swarm missions. The Tesla Sentry works best when communication is clear between all teammates and in earlier levels of the game. But at higher difficulties and levels, things can get extremely hectic, and friendly fire becomes inevitable.
The Tesla Tower Sentry Stratagem is kind of finicky. It has a low damage radius but manages to arc its way to teammates whenever it wants. Useful for holding off choke points and bug breaches, but becomes counterproductive in higher-difficulty missions. So, it’s going into C-Tier.
Pros
- Emits Electrical Charges and instantly kills unarmored foes like Weavers and Terminids
- Ideal for clearing out bug breaches, holding off choke points, and Swarm missions
- Easy to use in lower-difficulty missions
Cons
- Electrical Arcs can jump to teammates causing them to flatline
- With increased chaos at higher difficulties, friendly casualties become inevitable
RELATED: 8 Games Like Helldivers 2 You Need To Check Out
Summary – Best Sentry Stratagems in Helldivers 2
That pretty much wraps up our ranking of the Best Sentry Stratagems in Helldivers 2. Make sure to early deploy, mix and max Sentry Stratagems, keep comms clear, and protect your turrets. Also, make sure to strategize Sentry placement to maximize enemy denial potential. Stay tuned for more Helldivers 2 Stratagem Tier Lists at EsportsNext!